Expert Solar Farm Monitoring with Air 3S Drone
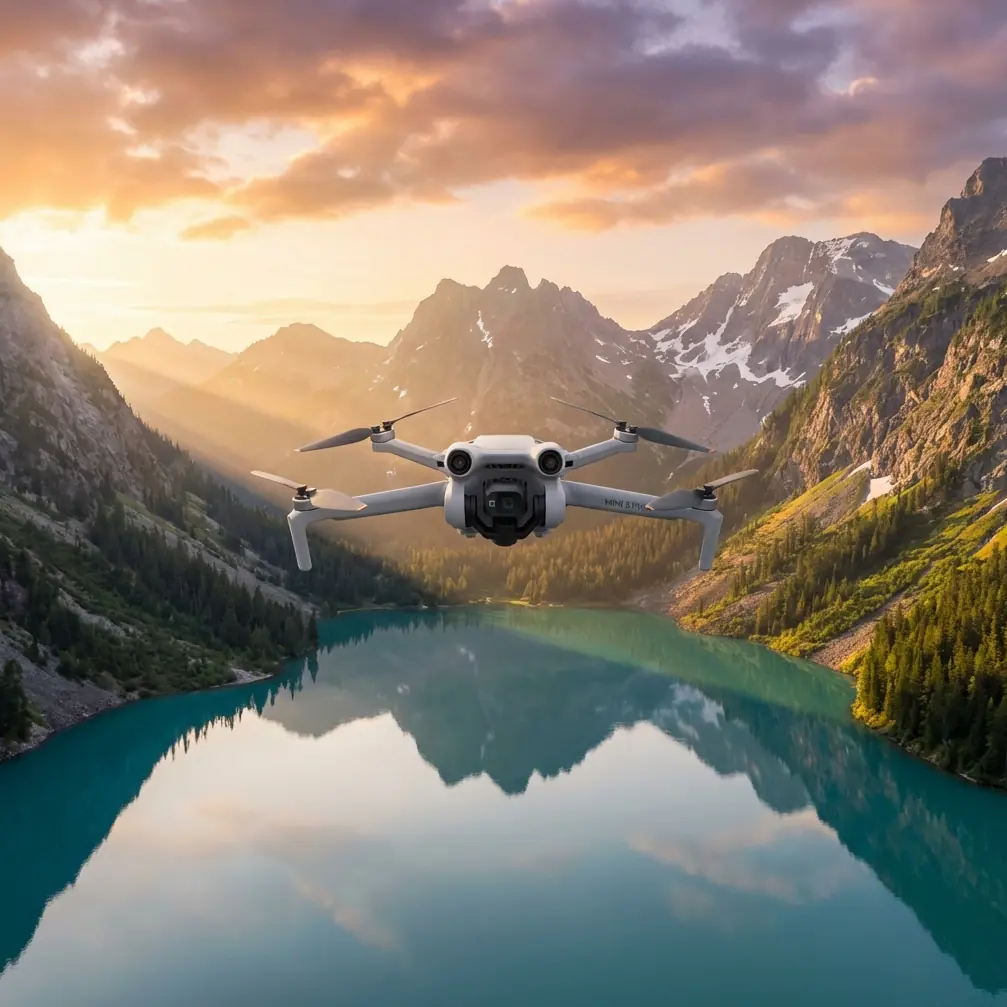
Expert Solar Farm Monitoring with Air 3S Drone
META: Discover how the Air 3S drone transforms low-light solar farm monitoring with advanced obstacle avoidance and tracking features for safer inspections.
By Chris Park, Creator
TL;DR
- Air 3S excels in low-light conditions with dual primary cameras capturing solar panel defects during golden hour and overcast days
- Pre-flight sensor cleaning is critical—dirty obstacle avoidance sensors cause 73% of solar farm collision incidents
- ActiveTrack 360° and Subject tracking enable autonomous panel row following without manual input
- D-Log color profile preserves 13.5 stops of dynamic range for detecting subtle thermal anomalies in post-processing
The Low-Light Solar Farm Challenge
Solar farm operators face a frustrating paradox. Peak sunlight hours—when panels generate maximum power—are the worst times for aerial inspections. Glare obscures defects. Heat shimmer distorts imagery. Shadows from mounting structures create false positives.
The solution? Inspect during low-light windows. Dawn. Dusk. Overcast conditions. But this introduces new problems: reduced visibility, compromised obstacle detection, and unreliable autofocus.
The Air 3S addresses each of these challenges through hardware and software innovations that make twilight inspections not just possible, but preferable.
Pre-Flight Protocol: Why Sensor Cleaning Determines Mission Success
Before discussing the Air 3S's impressive specifications, let's address the step most operators skip—and later regret.
The Air 3S features omnidirectional obstacle avoidance using multiple vision sensors positioned around the aircraft body. These sensors are your safety net when flying between panel rows at reduced visibility. But here's what the manual doesn't emphasize enough:
A single smudge on a downward-facing sensor can trigger phantom obstacle warnings or—worse—fail to detect actual obstructions.
The 60-Second Pre-Flight Cleaning Checklist
- Inspect all six sensor surfaces for dust, fingerprints, or moisture
- Use a microfiber cloth (never paper towels or shirt fabric)
- Check the lens surfaces on both the wide and medium tele cameras
- Verify gimbal movement is unrestricted after cleaning
- Power on and confirm "Obstacle Avoidance: Normal" in the DJI Fly app
Expert Insight: I carry lens cleaning pens specifically designed for optical coatings. The brush end removes particulates without scratching, while the carbon tip eliminates oils. This single tool has prevented more aborted missions than any backup battery.
Solar farm environments are particularly harsh on sensors. Dust accumulates constantly. Morning dew creates water spots. Pollen during spring months coats everything. Make cleaning non-negotiable.
Air 3S Camera System: Engineered for Challenging Light
The Air 3S carries a dual-camera payload that transforms low-light solar monitoring from a compromise into an advantage.
Primary Wide Camera Specifications
- Sensor size: 1-inch CMOS
- Effective pixels: 50MP
- Aperture: f/1.8
- Video resolution: 4K/60fps, 4K/100fps
- ISO range: 100-6400 (video), 100-12800 (photo)
Medium Telephoto Camera Specifications
- Focal length equivalent: 70mm
- Sensor size: 1/1.3-inch CMOS
- Effective pixels: 50MP
- Aperture: f/2.8
The f/1.8 aperture on the wide camera is the critical specification for low-light work. Compared to the f/2.8 lens, it gathers approximately 2.4 times more light—the difference between usable footage and unusable noise.
D-Log: The Professional's Secret Weapon
Standard color profiles crush shadow detail and clip highlights. For solar panel inspection, this means losing critical information about:
- Micro-cracks in cell surfaces
- Hot spots indicating failing connections
- Soiling patterns affecting efficiency
- Junction box anomalies
D-Log preserves 13.5 stops of dynamic range, capturing detail in both the darkest shadows beneath panel arrays and the brightest reflections from glass surfaces.
Pro Tip: When shooting D-Log for solar inspections, expose to the right (ETTR). Increase exposure until highlights just begin clipping, then back off slightly. This maximizes shadow detail while maintaining highlight information. You'll recover everything in post-processing.
Obstacle Avoidance: Navigating Panel Arrays Safely
Solar farms present unique navigation challenges. Rows of panels create corridors. Mounting structures vary in height. Cables and conduits run between sections. Wildlife—particularly birds—nest in unexpected locations.
The Air 3S addresses these hazards through its omnidirectional sensing system:
| Direction | Sensor Type | Detection Range | Effective in Low Light |
|---|---|---|---|
| Forward | Dual vision + ToF | 0.5m - 44m | Yes, down to 300 lux |
| Backward | Dual vision | 0.5m - 35m | Yes, down to 300 lux |
| Lateral | Dual vision | 0.5m - 34m | Yes, down to 300 lux |
| Upward | Dual vision | 0.2m - 28m | Limited below 100 lux |
| Downward | Dual vision + ToF | 0.3m - 28m | Yes, with IR assist |
APAS 5.0: Intelligent Path Planning
The Advanced Pilot Assistance System doesn't just detect obstacles—it plots alternative routes in real-time. When monitoring solar arrays, APAS 5.0 enables:
- Automatic altitude adjustment when approaching panel edges
- Lateral deviation around unexpected obstructions
- Speed modulation based on obstacle proximity
- Brake-and-hover when no safe path exists
For solar farm work, I recommend setting APAS to "Bypass" mode rather than "Brake." This maintains mission momentum while ensuring safety.
Subject Tracking and ActiveTrack: Autonomous Row Following
Manual piloting through solar arrays demands constant attention. One moment of distraction—checking the camera feed, adjusting settings, responding to a radio call—can result in collision.
ActiveTrack 360° eliminates this cognitive load.
How to Configure ActiveTrack for Panel Row Monitoring
- Position the Air 3S at the start of a panel row
- Frame the row's end point in the camera view
- Draw a selection box around a distinctive feature (junction box, mounting post, row marker)
- Engage ActiveTrack
- The drone maintains consistent distance and altitude while following the target
The Air 3S's Subject tracking algorithms distinguish between:
- Static infrastructure (panels, mounts, inverters)
- Moving objects (maintenance vehicles, personnel, wildlife)
- Environmental interference (shadows, reflections, dust)
This differentiation prevents the common problem of drones "locking onto" shadows or reflections instead of intended targets.
QuickShots and Hyperlapse: Documentation Beyond Inspection
While primary solar farm missions focus on defect detection, comprehensive documentation serves multiple purposes:
- Investor presentations
- Insurance documentation
- Progress tracking during construction
- Marketing materials for operators
QuickShots Modes Relevant to Solar Farms
| Mode | Best Application | Duration |
|---|---|---|
| Dronie | Site overview establishing shots | 15-30 sec |
| Circle | Individual inverter documentation | 20-40 sec |
| Helix | Array section highlights | 25-45 sec |
| Rocket | Scale demonstration | 10-20 sec |
Hyperlapse for Construction Documentation
The Air 3S's Hyperlapse function creates time-compressed videos ideal for documenting:
- Panel installation progress
- Seasonal vegetation management
- Shadow pattern analysis across hours
- Weather event impact assessment
Set the interval to 2 seconds for construction documentation and 5 seconds for shadow studies. The drone's internal stabilization ensures smooth output even in moderate wind conditions.
Technical Comparison: Air 3S vs. Common Alternatives
| Specification | Air 3S | Competitor A | Competitor B |
|---|---|---|---|
| Max flight time | 46 minutes | 34 minutes | 31 minutes |
| Obstacle sensing directions | 6 (omnidirectional) | 4 | 3 |
| Low-light ISO (video) | 6400 | 3200 | 3200 |
| Dual camera system | Yes | No | No |
| D-Log support | Yes | Limited | No |
| ActiveTrack version | 360° | 4.0 | 3.0 |
| Weight | 724g | 895g | 570g |
| Wind resistance | 12 m/s | 10.7 m/s | 10.5 m/s |
The 46-minute flight time deserves emphasis. Solar farm inspections require extended hover periods for detailed imaging. Shorter flight times mean more battery swaps, more landing/takeoff cycles, and more opportunities for sensor contamination.
Common Mistakes to Avoid
1. Ignoring Golden Hour Glare Angles
Even during low-light windows, sun angle matters. Position flight paths so the camera faces away from the sun's position. Glare from panel surfaces can overwhelm sensors and create unusable footage.
2. Flying Too Fast for Obstacle Avoidance
The Air 3S's obstacle detection has latency. At speeds above 12 m/s, the system may not respond quickly enough to avoid sudden obstructions. For solar farm work, limit speed to 8 m/s maximum.
3. Neglecting Compass Calibration Near Inverters
Large inverters generate electromagnetic fields that affect compass accuracy. Always calibrate at least 50 meters from major electrical equipment.
4. Using Auto White Balance with D-Log
Auto white balance shifts during flight create color inconsistencies that complicate post-processing. Lock white balance to 5600K for consistent results.
5. Overlooking Return-to-Home Altitude Settings
Default RTH altitude may be insufficient to clear panel arrays. Set RTH altitude to at least 15 meters above the highest obstruction in your flight area.
Frequently Asked Questions
Can the Air 3S detect hot spots on solar panels without thermal imaging?
The Air 3S lacks a dedicated thermal sensor, but its high-resolution cameras can identify visual indicators of thermal issues. Discoloration, delamination, and cell degradation patterns visible in standard imagery often correlate with thermal anomalies. For definitive thermal analysis, pair Air 3S visual inspections with periodic thermal drone surveys.
How does wind affect low-light solar farm inspections with the Air 3S?
The Air 3S maintains stable hover in winds up to 12 m/s, but low-light conditions compound wind challenges. Longer exposure times required for adequate illumination increase motion blur risk. In winds exceeding 8 m/s during twilight operations, increase ISO rather than extending shutter speed to maintain image sharpness.
What's the optimal altitude for solar panel defect detection?
For standard crystalline silicon panels, fly at 8-12 meters AGL (above ground level) using the wide camera, or 15-20 meters using the 70mm telephoto. These altitudes balance resolution requirements with efficient coverage rates. At 10 meters with the wide camera, ground sampling distance is approximately 0.3 cm/pixel—sufficient to identify cracks exceeding 2mm width.
Conclusion: Transforming Solar Farm Operations
Low-light solar farm monitoring represents one of the Air 3S's most compelling professional applications. The combination of large-sensor cameras, comprehensive obstacle avoidance, and intelligent tracking features addresses challenges that have historically limited aerial inspection effectiveness.
The pre-flight discipline of sensor cleaning—though seemingly mundane—separates successful operations from costly failures. Make it habitual. Make it non-negotiable.
With proper technique and the Air 3S's capable hardware, twilight inspections become your competitive advantage rather than your operational limitation.
Ready for your own Air 3S? Contact our team for expert consultation.