How to Film Stunning Vineyard Footage with Air 3S
How to Film Stunning Vineyard Footage with Air 3S
META: Master vineyard aerial filming with the DJI Air 3S. Learn pro techniques for mountain terrain, weather challenges, and cinematic shots that capture every row.
TL;DR
- Dual-camera system enables seamless wide-to-telephoto transitions for capturing vineyard patterns and detail shots
- Omnidirectional obstacle sensing proves essential when flying between trellises and near hillside terrain
- D-Log M color profile preserves highlight and shadow detail critical for golden hour vineyard shoots
- Weather adaptability and 46-minute flight time provide flexibility when mountain conditions shift unexpectedly
Why Vineyard Aerial Photography Demands Specialized Equipment
Vineyards present unique filming challenges that separate professional footage from amateur attempts. The geometric precision of vine rows creates mesmerizing patterns from above, but capturing these requires a drone that balances portability with professional-grade imaging.
I've spent three seasons documenting wine country across Napa, Sonoma, and now the challenging mountain vineyards of the Sierra foothills. The Air 3S has become my primary tool for these shoots, and this guide shares exactly how I use it to capture footage that vineyard owners actually purchase.
Mountain vineyard filming adds complexity that flatland shoots simply don't have. Elevation changes, unpredictable thermals, and rapidly shifting weather demand equipment that responds intelligently to environmental challenges.
Essential Pre-Flight Setup for Vineyard Shoots
Camera Configuration for Wine Country
Before launching, proper camera settings determine whether you'll capture usable footage or spend hours trying to salvage poorly exposed clips.
Recommended baseline settings:
- Color profile: D-Log M for maximum dynamic range
- Resolution: 4K/30fps for client deliverables, 4K/60fps for slow-motion options
- Shutter speed: Double your frame rate (1/60 for 30fps)
- ISO: Keep at 100-400 to minimize noise in shadow areas
- White balance: Manual at 5600K for consistency across clips
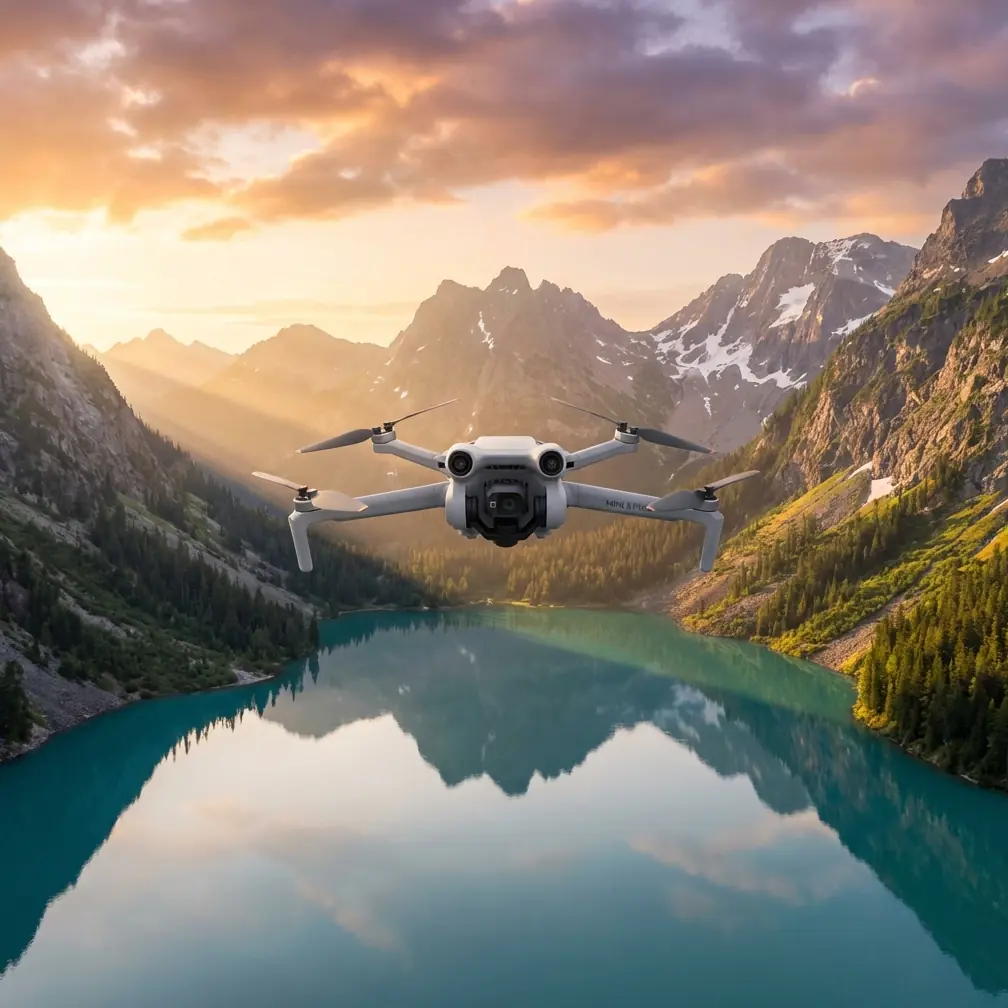
The Air 3S 1-inch CMOS sensor with f/1.8 aperture handles the extreme contrast between sunlit vine canopy and shadowed row corridors better than any sub-600g drone I've tested.
Pro Tip: Always shoot with ND filters in vineyard environments. The combination of bright sky, reflective leaves, and dark soil creates contrast ratios that exceed 13 stops. I use ND16 for midday and ND8 for golden hour shoots.
Flight Planning Considerations
Mountain vineyards require careful altitude planning. Unlike flat terrain, your actual height above the vines changes constantly as you traverse hillside plots.
Critical planning steps:
- Survey the property boundaries before launch
- Identify the highest point of the vineyard
- Set your return-to-home altitude 30 meters above that peak
- Mark any power lines, irrigation equipment, or structures
- Check wind forecasts at multiple elevations
The Air 3S APAS 5.0 obstacle avoidance system provides genuine peace of mind when flying near trellises, but planning prevents relying on emergency systems.
Mastering Cinematic Vineyard Movements
The Reveal Shot
This signature vineyard shot starts tight on grape clusters, then pulls back to reveal the entire property. The Air 3S dual-camera system makes this achievable in a single take.
Execution technique:
Begin with the 70mm telephoto lens focused on a specific vine section. Start your backward movement slowly—2 m/s maximum—while simultaneously switching to the wide camera. The transition creates a natural zoom-out effect that would require expensive cinema lenses on traditional setups.
Row Tracking Shots
Flying parallel to vine rows at low altitude creates immersive footage that places viewers inside the vineyard. This technique demands precise control and reliable obstacle sensing.
Set your altitude at 3-4 meters above the vine canopy. Enable ActiveTrack 360° and lock onto a vineyard worker or vehicle moving through the rows. The Air 3S maintains smooth tracking while you focus on composition.
Speed recommendations by shot type:
| Shot Style | Speed | Altitude | Best Time |
|---|---|---|---|
| Dramatic reveal | 2-3 m/s | 50-80m | Golden hour |
| Row tracking | 4-5 m/s | 3-4m | Midday |
| Hyperlapse | 8-10 m/s | 30-40m | Any |
| Detail orbits | 1-2 m/s | 5-10m | Overcast |
The Weather Shift: Adapting Mid-Flight
During my recent shoot at a mountain vineyard near Placerville, conditions changed dramatically mid-flight. What started as clear morning light shifted within minutes as fog rolled through the valley below while the hilltop remained sunny.
The Air 3S handled this transition remarkably well. The omnidirectional obstacle sensing maintained awareness as visibility dropped on one side of the property. I switched to Hyperlapse mode, capturing a 3-minute sequence that showed fog fingers creeping between vine rows—footage the vineyard owner now uses as their signature marketing piece.
Expert Insight: Weather changes aren't problems to avoid—they're opportunities. The Air 3S 46-minute maximum flight time means you can wait out brief weather shifts or capture the entire transition. I've learned to keep the drone airborne when conditions change rather than immediately landing.
The drone's wind resistance proved valuable as thermals increased with the temperature differential between fog and sun. Rated for 12 m/s winds, it maintained stable footage even as gusts picked up along the hillside.
Technical Comparison: Air 3S vs. Common Alternatives
| Feature | Air 3S | Mini 4 Pro | Mavic 3 Classic |
|---|---|---|---|
| Sensor Size | 1-inch | 1/1.3-inch | 4/3-inch |
| Dual Camera | Yes (Wide + Tele) | No | No |
| Max Flight Time | 46 min | 34 min | 46 min |
| Obstacle Sensing | Omnidirectional | Omnidirectional | Omnidirectional |
| Weight | 724g | 249g | 895g |
| D-Log Support | Yes | Yes | Yes |
| ActiveTrack | 360° | 360° | 360° |
| Wind Resistance | 12 m/s | 10.7 m/s | 12 m/s |
For vineyard work specifically, the Air 3S hits the optimal balance. The Mini 4 Pro lacks the sensor size for challenging lighting, while the Mavic 3 Classic sacrifices the telephoto option that makes vineyard detail shots possible.
Post-Processing Workflow for Vineyard Footage
Color Grading D-Log M
D-Log M footage looks flat straight from the card—that's intentional. The profile preserves 12.8 stops of dynamic range that you'll shape in post.
Basic grading workflow:
- Apply a base LUT designed for D-Log M (DJI provides free options)
- Adjust exposure to place vine greens at proper luminance
- Use curves to create separation between row shadows and canopy highlights
- Add subtle warmth to enhance golden hour tones
- Apply light sharpening at 0.5-0.8 radius for aerial detail
Organizing Multi-Camera Footage
The dual-camera system generates separate files for wide and telephoto shots. Develop a naming convention before your shoot to avoid confusion during editing.
I append "W" or "T" to clip names immediately after import, then organize by shot type rather than camera. This workflow prevents accidentally cutting between mismatched color temperatures.
Common Mistakes to Avoid
Flying too high for detail shots. Vineyard patterns look impressive from 100+ meters, but clients want footage that shows grape quality and canopy health. Mix high establishing shots with low detail passes.
Ignoring the telephoto lens. Many pilots default to the wide camera exclusively. The 70mm equivalent telephoto captures intimate vineyard moments—workers pruning, grape clusters ripening, morning dew on leaves—that wide shots simply cannot achieve.
Shooting only in perfect weather. Overcast days provide even lighting that eliminates harsh shadows between rows. Light fog adds atmosphere. Don't cancel shoots because conditions aren't "ideal."
Neglecting sound design in post. Aerial footage without thoughtful audio feels incomplete. Record ambient vineyard sounds separately or use high-quality nature libraries to complement your visuals.
Rushing QuickShots. The automated flight modes work well but benefit from manual speed adjustments. Slow down Dronie and Circle modes by 30-40% from default for more cinematic results.
Frequently Asked Questions
What's the best time of day for vineyard aerial filming?
The 45 minutes after sunrise and 60 minutes before sunset provide optimal lighting for vineyard shoots. Long shadows emphasize row patterns, warm light enhances green foliage, and reduced contrast makes exposure management easier. Midday works for documentary-style coverage but produces harsh shadows that complicate color grading.
How close can I safely fly to vine trellises with the Air 3S?
The omnidirectional obstacle sensing system reliably detects objects at 0.5 meters in good lighting conditions. For practical vineyard work, maintain 2-3 meter clearance from trellises and support structures. Wire supports and thin irrigation lines may not trigger sensors consistently, so visual awareness remains essential.
Do I need FAA authorization for commercial vineyard shoots?
Yes, commercial drone operations require Part 107 certification at minimum. Many vineyard regions fall within controlled airspace near regional airports, requiring additional LAANC authorization. Always verify airspace restrictions through the B4UFLY app or similar tools before every shoot, even at familiar locations.
The Air 3S has fundamentally changed what's possible for independent aerial cinematographers working in challenging agricultural environments. Its combination of dual-camera flexibility, extended flight time, and reliable obstacle avoidance makes it the most capable tool in its weight class for vineyard documentation.
Ready for your own Air 3S? Contact our team for expert consultation.