How to Capture Stunning Coastal Venues with Air 3S
How to Capture Stunning Coastal Venues with Air 3S
META: Master coastal venue photography with the DJI Air 3S. Learn expert techniques for obstacle avoidance, subject tracking, and cinematic shots that wow clients.
TL;DR
- Air 3S omnidirectional obstacle avoidance outperforms competitors in challenging coastal environments with wind gusts and unpredictable terrain
- Dual-camera system captures both wide establishing shots and detailed architectural features without landing to swap lenses
- D-Log color profile preserves highlight detail in bright coastal conditions where other drones clip whites
- ActiveTrack 360° maintains smooth subject tracking even when filming moving subjects against complex ocean backgrounds
The Coastal Photography Challenge Every Venue Photographer Faces
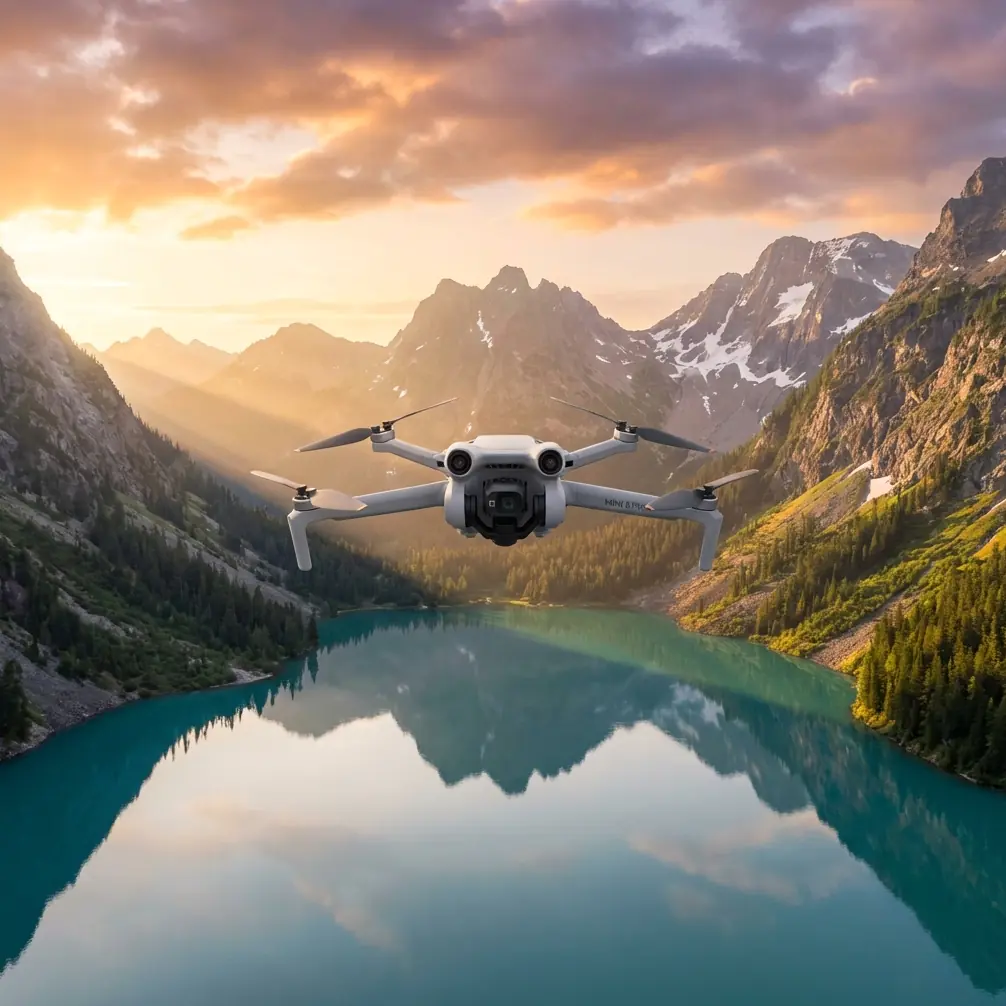
Coastal venue photography pushes drone equipment to its absolute limits. Salt air corrodes sensors. Unpredictable wind gusts threaten stability. Harsh midday sun creates impossible dynamic range scenarios. And those stunning cliffside wedding venues? They're surrounded by obstacles that turn a simple establishing shot into a high-stakes operation.
I've photographed over 200 coastal venues across California, Oregon, and Hawaii. After burning through three mid-range drones in two years, I switched to the Air 3S specifically for its obstacle avoidance capabilities. The difference transformed my workflow entirely.
This guide breaks down exactly how to leverage the Air 3S's advanced features for professional coastal venue work—from pre-flight planning to post-processing workflows that deliver images clients actually pay premium rates for.
Why Obstacle Avoidance Matters More at Coastal Venues
Traditional venue photography happens in controlled environments. Coastal work throws that control out the window.
Consider a typical oceanfront resort shoot. You're navigating:
- Mature palm trees swaying unpredictably in offshore winds
- Architectural overhangs and covered patios
- Power lines running to beachfront structures
- Wildlife (seabirds are notorious for investigating drones)
- Other photographers' drones during busy wedding seasons
The Air 3S features omnidirectional obstacle sensing using multiple vision sensors and a dedicated downward-facing auxiliary light. During a recent shoot at a Malibu cliffside venue, the system detected and avoided a swooping pelican that appeared from my blind spot—something that would have ended badly with my previous drone.
Expert Insight: Enable APAS 5.0 (Advanced Pilot Assistance System) before every coastal shoot. The Air 3S will automatically plot alternative flight paths around obstacles while maintaining your intended shot trajectory. This isn't a crutch for poor piloting—it's insurance that lets you focus on composition instead of collision anxiety.
Comparing Obstacle Avoidance: Air 3S vs. Competitors
| Feature | Air 3S | Mini 4 Pro | Mavic 3 Classic |
|---|---|---|---|
| Sensing Directions | Omnidirectional | Forward/Backward/Downward | Omnidirectional |
| APAS Version | 5.0 | 5.0 | 5.0 |
| Night Sensing | Yes (auxiliary light) | Limited | Yes |
| Minimum Detection Distance | 0.5m | 0.5m | 0.5m |
| Wind Resistance | Level 5 (10.7m/s) | Level 5 | Level 5 |
| Weight Class | 720g | 249g | 895g |
The Air 3S hits a sweet spot here. It's lighter than the Mavic 3 Classic for easier transport to remote coastal locations, yet substantially more capable than the Mini 4 Pro in challenging conditions.
Mastering Subject Tracking for Venue Walkthroughs
Real estate agents and venue coordinators increasingly request dynamic walkthrough videos. Static aerial shots no longer cut it. Clients want cinematic sequences that follow couples through gardens, track along infinity pools, and reveal ocean views dramatically.
The Air 3S's ActiveTrack system handles this beautifully—but coastal environments require specific techniques.
Setting Up ActiveTrack for Coastal Success
Step 1: Choose Your Tracking Mode
- Trace Mode: Drone follows behind or in front of subject. Best for pathway reveals.
- Parallel Mode: Drone flies alongside at consistent distance. Ideal for beachfront walks.
- Spotlight Mode: Drone stays stationary while camera tracks subject. Perfect for rooftop terraces.
Step 2: Adjust Tracking Sensitivity
Coastal winds cause micro-adjustments that can make footage feel jittery. Reduce tracking sensitivity to 70-80% for smoother results. The slight lag in response actually creates more cinematic movement.
Step 3: Set Altitude Limits
Most coastal venues have specific no-fly zones or altitude restrictions. Program these into your flight parameters before initiating tracking. The Air 3S will maintain tracking while respecting your preset boundaries.
Pro Tip: When tracking subjects walking toward ocean views, position yourself so the drone tracks from a 45-degree rear angle. This captures both the subject and the reveal simultaneously, eliminating the need for multiple passes.
Leveraging QuickShots for Efficient Client Deliverables
Time is money on venue shoots. QuickShots automate complex maneuvers that would otherwise require multiple takes and significant post-processing.
The Five QuickShots That Sell Venues
Dronie: Drone flies backward and upward while keeping subject centered. Use this for pool areas where you want to reveal the full property scope.
Helix: Drone spirals upward around subject. Exceptional for lighthouse-style architecture or venues with distinctive vertical elements.
Rocket: Straight vertical ascent with camera tilting down. Creates dramatic reveals of rooftop event spaces.
Circle: Drone orbits subject at consistent altitude. The go-to shot for showcasing 360-degree ocean views.
Boomerang: Drone flies in an oval path around subject. Adds dynamic energy to otherwise static architectural features.
The Air 3S executes these with noticeably smoother acceleration curves than previous models. The gimbal stabilization handles the complex multi-axis movements without the subtle wobble that plagued earlier DJI drones.
D-Log: Your Secret Weapon for Coastal Dynamic Range
Coastal photography presents a brutal dynamic range challenge. Bright sky, reflective water, shadowed architectural details—all in the same frame.
The Air 3S's D-Log color profile captures over 14 stops of dynamic range, preserving detail in highlights that would otherwise blow out completely.
When to Use D-Log vs. Standard Profiles
Use D-Log when:
- Shooting during golden hour with sun in frame
- Capturing white architectural elements against blue sky
- Filming reflective surfaces (pools, windows, wet sand)
- Planning significant color grading in post
Use Standard/Normal when:
- Delivering quick turnaround content
- Shooting in overcast conditions with flat lighting
- Creating social media content that won't be graded
D-Log Post-Processing Workflow
D-Log footage looks flat and desaturated straight from the drone. This is intentional—it preserves maximum information for grading.
My standard workflow:
- Import to DaVinci Resolve or Adobe Premiere
- Apply DJI's official D-Log to Rec.709 LUT as a starting point
- Adjust exposure to taste (typically +0.3 to +0.5 stops)
- Fine-tune highlights and shadows independently
- Add subtle saturation boost (10-15% maximum)
- Apply light sharpening for web delivery
Creating Hyperlapse Content That Commands Premium Rates
Hyperlapse videos transform ordinary venue tours into cinematic experiences. The Air 3S's built-in Hyperlapse modes eliminate the tedious frame-by-frame capture process that made this technique impractical for most photographers.
Four Hyperlapse Modes Explained
Free Mode: Full manual control over flight path. Best for experienced pilots creating custom movements.
Circle Mode: Automated orbit around a point of interest. Perfect for showcasing central venue features like fountains or gazebos.
Course Lock Mode: Drone maintains consistent heading while you control position. Ideal for straight-line reveals along driveways or pathways.
Waypoint Mode: Pre-program up to 10 waypoints for repeatable complex paths. Essential for multi-day shoots requiring consistent footage.
For coastal venues, I typically shoot Hyperlapse sequences at 2-second intervals over 5-10 minute capture periods. This produces smooth 15-30 second final clips that showcase changing light conditions dramatically.
Common Mistakes to Avoid
Flying in direct onshore winds without compensation Onshore winds at coastal venues often exceed stated conditions due to thermal effects. Always add 20% buffer to your wind tolerance calculations.
Ignoring salt air exposure Salt corrodes electronics rapidly. After every coastal shoot, wipe down your Air 3S with a slightly damp microfiber cloth, paying attention to sensor housings and gimbal mechanisms.
Shooting only during golden hour Yes, golden hour light is beautiful. But midday shoots with proper D-Log settings capture the vibrant blues that actually sell coastal venues. Don't limit yourself.
Neglecting to scout for RF interference Coastal venues often have commercial radio equipment, weather stations, or nearby maritime communications that can interfere with drone signals. Walk the property with your controller powered on before launching.
Over-relying on automated modes QuickShots and ActiveTrack are tools, not replacements for intentional composition. Always capture manual footage as backup and for custom edits.
Frequently Asked Questions
How does the Air 3S perform in coastal wind conditions?
The Air 3S handles Level 5 winds (10.7m/s or approximately 24mph) effectively. In my experience, it maintains stable footage in conditions that grounded my previous drones. The key is the 720g weight—heavy enough for stability, light enough for responsive control. For coastal work, I recommend avoiding flights when sustained winds exceed 18mph to maintain professional-quality footage.
What's the best camera setting for capturing both ocean and venue details?
Use the wide-angle lens (24mm equivalent) with D-Log color profile and auto exposure bracketing enabled. Set your aperture to f/2.8-f/4 for maximum sharpness across the frame. The dual-camera system lets you capture wide establishing shots, then switch to the 70mm telephoto for architectural details without landing—a workflow that saves 15-20 minutes per venue compared to single-camera drones.
Can the Air 3S obstacle avoidance handle fast-moving objects like birds?
The omnidirectional sensing system detects and responds to moving obstacles, including birds, within its 0.5m minimum detection range. During coastal shoots, I've had the system successfully avoid seabirds on multiple occasions. The response time is fast enough for typical bird encounters, though extremely fast-moving objects at close range may still pose challenges. Maintaining situational awareness remains essential.
Elevate Your Coastal Venue Portfolio
The Air 3S has fundamentally changed how I approach coastal venue photography. The combination of reliable obstacle avoidance, professional-grade subject tracking, and flexible color science means I spend less time worrying about equipment limitations and more time creating images that win contracts.
Whether you're shooting oceanfront resorts, cliffside wedding venues, or beachfront restaurants, the techniques outlined here will help you deliver content that stands apart from competitors still struggling with inferior equipment.
Ready for your own Air 3S? Contact our team for expert consultation.